Submitting Assignments using GitHub
Introduction
This article walks through the steps needed to complete Assignment 0.
For this course, we only need to use 5 commands.
Although it is not required for this course, it is highly recommended that you learn the basics of git.
The documentation page provided by git-scm is extremely helpful.
It includes links to a free book on git as well as a cheat sheet with the most common git commands.
Cloning a Repository
After accepting the assignment, you are provided with a link to your own private repository. To work with it on your local machine, you will first need to clone it. To clone it, you will need to authenticate that you are allowed to work with that repository. This is done by either SSH or HTTPS.
If you want to add and use an SSH key to authenticate, follow the instructions listed here.
This article will walk through authentication via HTTPS.
To clone your repository, you will need the HTTPS link.
This is the same as the link to your actual repository.
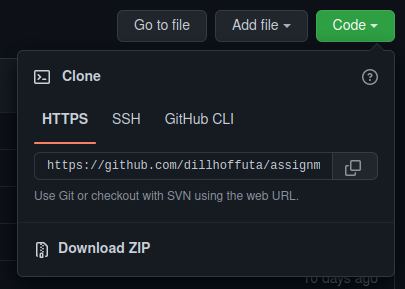
You can also view it by clicking on the green Code button and selecting HTTPS.
In a terminal window, run the command git clone [link], where [link] is the URL you copied for your respository.
You should be prompted to enter your GitHub username and password.
If you use your regular account password, you will see something similar to the output below
As stated in the error message, GitHub does not support using your password to authenticate via HTTPS. The link that is provided in the error message directs your to an article explaining this decision. The article links to another article on how to set up a personal access token (direct link). Create a personal access token as described in the direct link. This will be used in place of your regular password, so make sure you keep it somewhere safe.
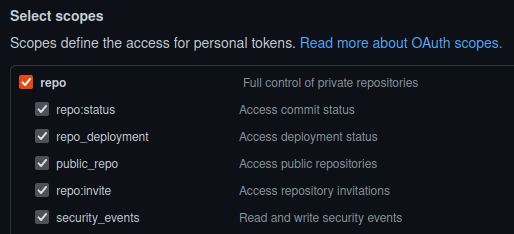
When creating the access token, be sure to at least select the repo scope.
This will ensure that your access token is authorized to clone your repository.
With the generated access token, you can successfully clone your repository via HTTPS. As a reminder, entering text into a password prompt in terminal will not show the characters you are typing. Do not worry! It is still reading the input.
Adding a new file
Now that the repository is cloned, we can begin working with it locally.
The assignment requires us to create a program which will print the lines of CSV to the terminal window.
This requires opening data.csv, looping through its contents, and printing each line as our program reads it.
Start by creating a new file named read_csv.c using your favorite code editor.
It does not matter which editor you use.
It only matters that the file you create is in the repository folder.
This assignment is really about making sure you can use git properly, so a solution has been given below.
#include <stdio.h>

#define BUF_SIZE 128

int main() {
    char buffer[BUF_SIZE] = { 0 };

    FILE *fp = fopen("data.csv", "r");
    if (fp == NULL) return 1;

    while (fgets(buffer, BUF_SIZE, fp)) {
        printf("%s", buffer);
    }

    return 0;
}
Once we have finished editing the code, we can add it to our local repository.
To check the current status of changes in our repo, use git status.
We have created a file named read_csv.c, but it is not currently tracked by our repository.
To track this file, we need to add it via git add read_csv.c.
After adding the file, we can see that our local repo’s status has changed.
Now that the file is being tracked, any modifications we make to it will be recorded.
Git keeps snapshots of each state the file is in.
We can always review a history of our file’s changes and see how the code has developed over the lifetime of a project.
In that status output above, our repository detects changes to read_csv.c.
Committing Changes
If we are happy with the changes, we can commit them to the repository using git commit.
A commit should be accompanied by a message explaining what was changed.
This will be very useful later on when you need to review what changes were made and why.
Since this code fulfills the requirements of the assignment, let’s form our message that way.
We can commit with a message with the following command.
git commit -m "Completed assignment."
If you have other tracked files with changes that needed to be committed, you can use the flag -a to add them with your commit.
Pushing your local changes to the remote repository
When you clone a repository, you get a full copy of that repository including all of its data.
If the server that is hosting your project crashes, you will still have a full copy of the repository on your local machine.
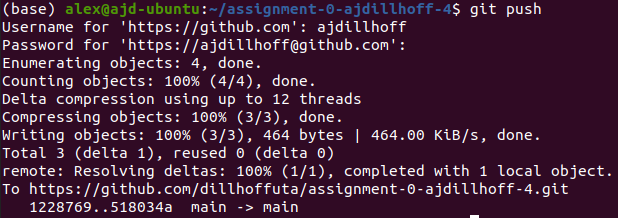
To synchronize your changes with the local repository, you can push the local files with git push.
If we view the website for our repository, it shows our changes.
That is all that is needed for submitting your assignments. If the code is on your remote repository, than it will be considered as your submission.


